We won't always win the battles, but our tanks will be the envy of all our enemies.
That’s the mindset people like me should have so they don’t get demoralized by losing game after game, giving up the hobby and starting collecting Pokemon cards.
Learn how to illuminate military vehicles
In order for our vehicles to shine on the game table or have a differential point of quality compared to others, this objective will be achieved through good painting, but this quality will always be based on the correct way of creating lights on the vehicle body. . These lights will be generated in a progressive way through various lighting techniques, which can be used individually or together, everything will depend on how we want to complicate our lives, but I already tell you that the more effects, layers and lights, the better.
Why are lights so important?
For many reasons.
The first is because our eyes are trained to detect light, our brain processes it and depending on the intensity of light on an object, the brain creates its shapes, distance, size, volumes, etc. From there, if a light is well made, our brain will not have to “work”, so the light effect will be pleasant and, consequently, our brain should not make an effort and will send us the order that we like what we see. See , it’s that simple.
On the other hand, when generating light on a vehicle we give it volumetric information, that is to say, that when illuminating we create planes and depth , so the shapes will be much more visible and, ultimately, we will be creating a contrast, which is the difference between light and dark.
Obviously if we put two images of the same vehicle, one without lighting, only with ambient light, and the other illuminated, it is clear which one attracts attention. Whether we like the way of lighting or not, that is a matter of taste, but we have achieved the effect of attraction with light.
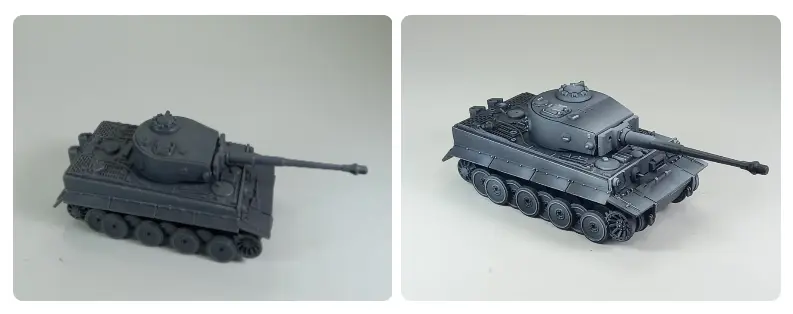
It must be taken into account that, if we slightly exaggerate the lights during the lighting process, later when we do the Weathering on the illuminated or degraded surface from light to dark, the aging effects will slightly lower the intensity of the light. They’ll keep it in the background, but they won’t make it disappear entirely. That is what would happen if we make dim or poorly contrasted lights as we can see in the following photograph, therefore, if we risk a little when lighting a vehicle, we gain that.
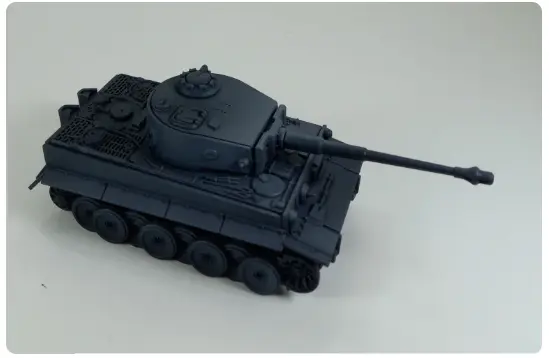
The first thing to keep in mind is that if we start from a base color and make several lights, from dark to light unidirectionally, the base color will be recessive as a shadow color, right? So we will have distorted the original color and we will have burned the color excessively with the accumulation of lights. To avoid this, what we will do is start with the base color slightly darkened by mixing it, or with a similar darker color, so that the base color that we want is the first light that we apply and thus, progressively increase the light without saturating it. I complete the lights with white.
Downscaling theory
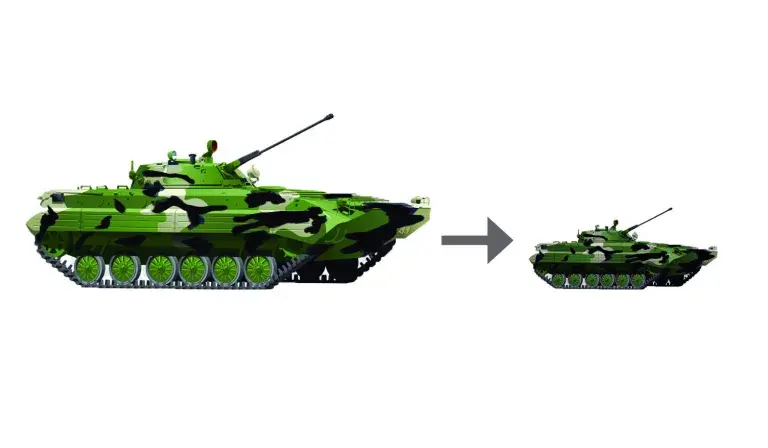
Before starting with the types of light received on a vehicle, I would like to make a point about this concept. This theory is somewhat controversial. It tells us that, when passing a scale element, for example, from 1:1 to 1:56, what we do is reduce the size, keeping all the shapes and volumetric characteristics of the original, but in this reduction, what happens? with color and light? In theory, the color and the light received are the same, but for practical purposes, the color changes as the area is compressed and reduced, so it becomes darker. For this reason when reducing the model, we should exaggerate the lights so that at the same distance we can distinguish all angles and shapes of the vehicle that are lost in the distance or reduction.
Types of lights
With the concept of light that an object receives understood, we will discuss the types of lights that we can do on a vehicle individually, so that you know them and know the effect they generate one by one, giving you the freedom that once known, you can apply a , two or all at the same time on the same model.
Overhead light:
With the base color applied, we could already make the first light through the first lighting concept, which is the overhead light, which consists of illuminating the vehicle from its zenith, that is, the light comes from the top at exactly 90º.
This light is widely used and known by painters of figures and busts, because they are vertical elements (from head to toe), from top to bottom, where the light is graduated from brightest to least bright. In military vehicles it is totally useless , since, when applied to the letter, it would burn the upper part due to the right and flat angles that make up the vehicle, leaving excessively illuminated parts and others totally without reflected or degraded light, because geometrically, a tank usually be a horizontal piece.
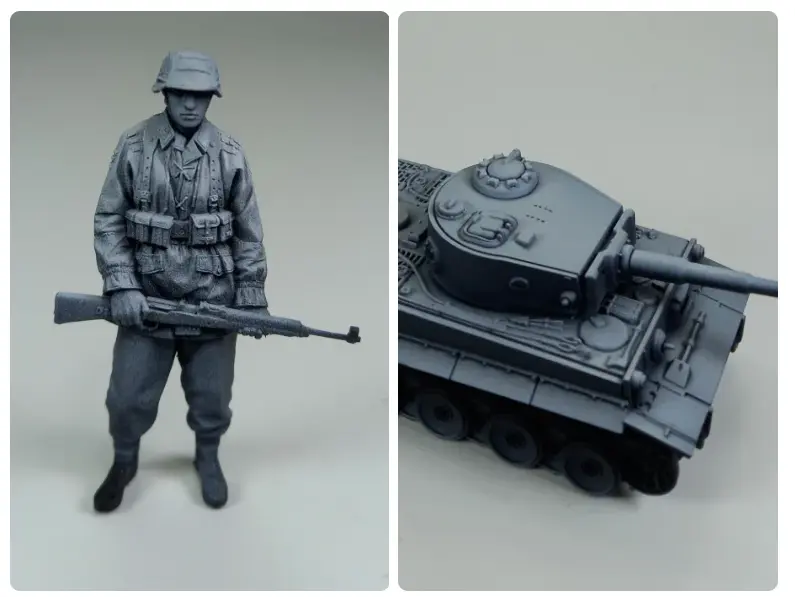
As you can see in the examples, the overhead light in the figure progressively from top to bottom, correct in gradation, on the other hand, in a vehicle with flat surfaces, the light is accumulated in the upper part, leaving the sides and bottom completely devoid of light. and therefore, absent of appreciable details.
Ceiling-front light
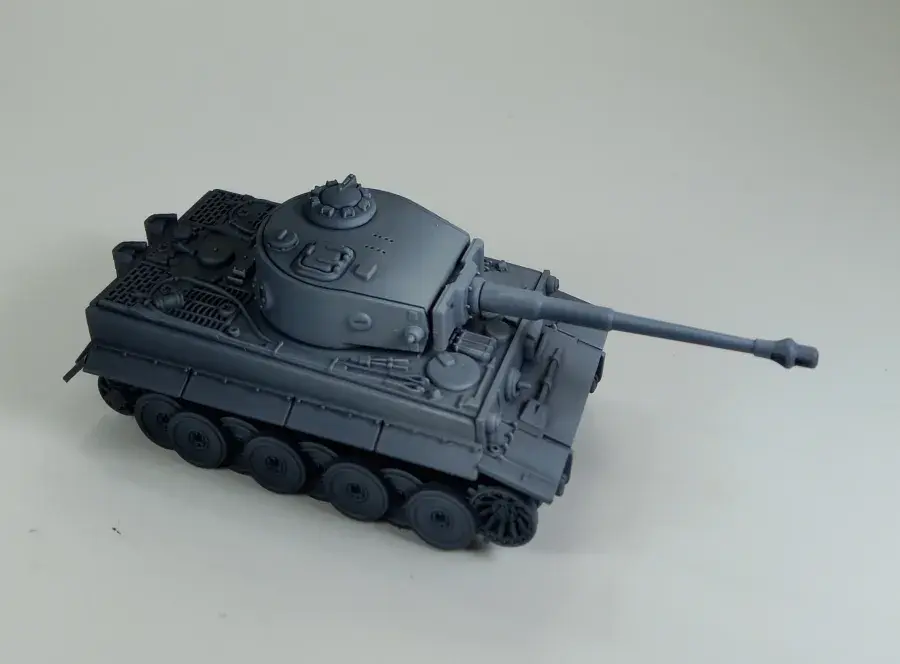
To solve the problem of light saturation that we found in the previous zenithal light, with this other type of light, we correct the angle of incision of the light, and what we would do is move the light forward, so that the vehicle receives the light frontally from 45º. In this way we create a frontal light and gradient to the rear, taking advantage of the elongated geometric shape of the vehicle. So the front will always be brighter than the back. This way of lighting also indicates to the viewer the direction of the vehicle towards which it is facing as the front part is illuminated, and the rear part is darker and less worked at the level of light.
Light by planes
It consists of making each plane or section of the vehicle receive light independently, thus creating a light-dark, light-dark pattern, panel by panel. It is advisable, in order not to have a very marked contrast, to have previously made a slight front overhead light.
It is a method of lighting something more elaborate than the previous ones, since you have to detect the planes and decide the division of the planes, mask with tape or a piece of cardboard freehand and repeat the lighting process plane by plane. The result, as we said, may be somewhat forced and totally unreal, but with a previous overhead/frontal light, the contrast between individual planes would be softened, giving a very colorful effect that is very pleasing to the eye, since the planes, being illuminated separately , create a very visual contrast of volumes.
Modular or modulating light
This light consists of “modulating” or illuminating planes or areas of the vehicle in a forced and totally random way. That is to say, to illuminate a detail or a plane, even if it is in a shadow area, in this way what we do is force the lighting so that it is more visible in contrast to the rest of the area.
This light can also be treated in color. Instead of painting that detail with a light color that is lighter than it should be, we could paint it in a more intense color, a paler color, or even a different color that is totally out of harmony with the vehicle.
The modulation can be applied punctually with an airbrush or to a greater extent with a brush, since we incise a somewhat exaggerated point of light on small details that we want to be visible such as screws, hinges, gates, profiles, etc.
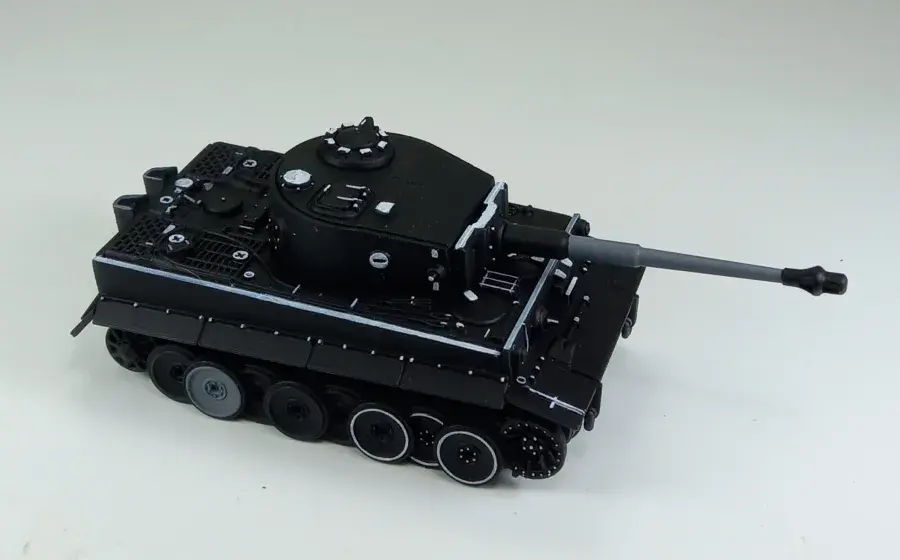
In the example we have done some brush modulations with white on black so that you can see what it consists of. If we dilute the white, we will obtain transparencies and with this diluted paint we will be able to make softer modulations for larger planes, than not applying pure white. We have also illustrated in the example a wheel painted in gray and the gun of the tank, showing another type of chromatic modulation (another color), instead of a value modulation (white increase).
Spot Light
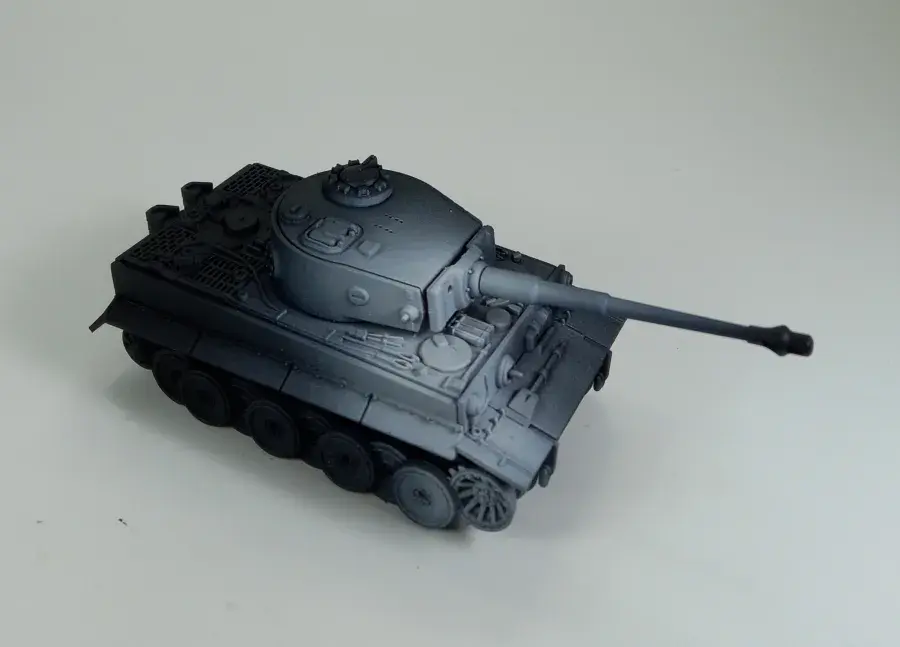
This light is normally only used in Box diorama , where there is only one point of view and we fully illuminate the vehicle in one direction, giving meaning to the light from a single point of view that is that of the viewer, since the other points of view are closed, or it is not possible to see the piece because the box surrounds the model. It is not a type of lighting designed for playing or for an open diorama, since the light is very forced from a single point and if we see the vehicle from other points, it will not have any visible detail due to the absence of lighting.
Filter
The filter is not any type of lighting, but it is a very useful resource to complement the lighting work.
In the first place, a filter is used to vary, tint or tone a color , applying a layer of diluted paint without leaving excess as we would leave in a wash. To get an idea, it is exactly the same as photographic filters. For example, if we have a yellowish vehicle and we filter in red, obviously the vehicle will end up having an orange tendency.
What does this have to do with the lights? Well, if in the event that you have made a somewhat irregular degradation in one of the steps, or you have made a mistake when making the lights, what the filter will do, within certain limits, will be to hide, feint that chromatic asynchrony , than not correct it, but better a filter that unifies tones, than nothing.
Apart from this, when making lights we will inevitably use white or colors that have white in their composition, so white, being the most recessive color of all (recessive is the same as poor or weak compared to others) will absorb a large part of the color of the filter, so it will give the lights more chromatic intensity, and therefore more visual interest.
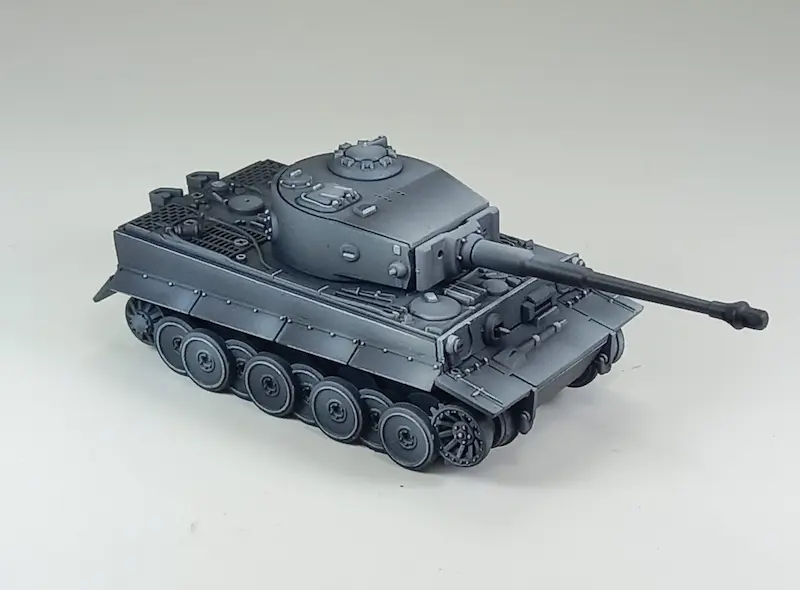
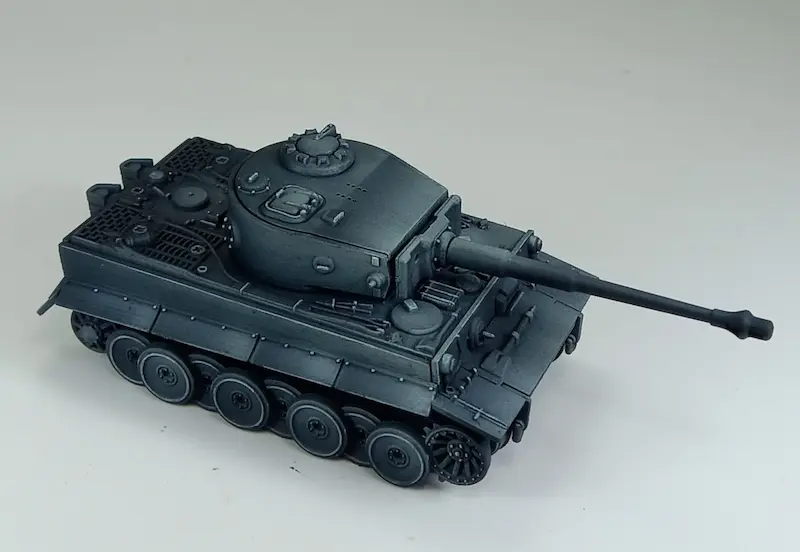
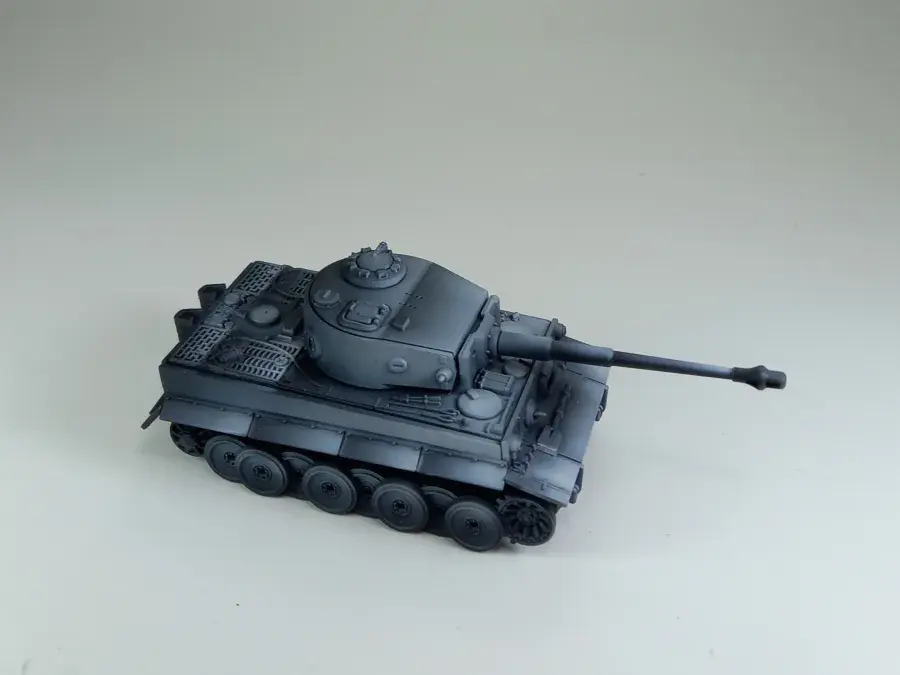
In the example we see a vehicle painted with a front overhead light, with a slight light by planes and finished off with a brush modulation to highlight the details. Finally, being a German tank we have made a filter in a dark blue/grey, which has united all the light effects and softened the contrast generated by using white as light against black as a base.
Illuminate military vehicles conclusion
And that’s all. At the moment we have seen particularly the theory of the types of lighting that we can do individually or together, but we have not addressed the step-by-step process of each one of them, but rather we have listed them and we have shown a finished individual example of each type. .
If you’re interested in us doing a detailed article on each type of lighting, comment on it on the Mushroom and if there are enough requests, we’d love to illustrate it for you, even if we still haven’t won any games.

